The configuration is simple only. just place the folder on ur computer then follow the below steps
How to Deploy ASP. Net Websites on IIS 7.0
From now onwards, I will describe one example to deploy your ASP.NET websites on IIS 7.0.
Step 1: From Visual Studio, publish your Web application.
Step 2: Copy the published application folder to "C:\intepub\wwwroot" [default] folder.
Step 3: From RUN - > inetmgr -> OK
The following screen will come. This is the main page for any application. There are three panels.
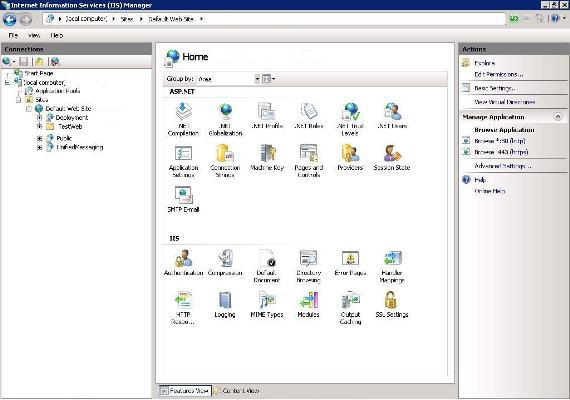
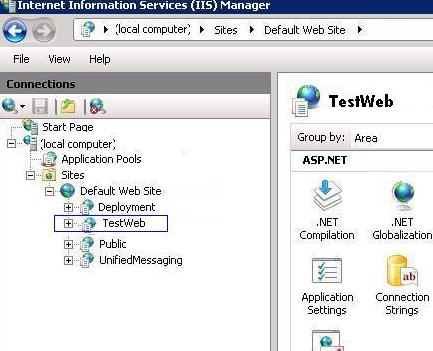
"TestWeb" is a recently pasted webapplication on your wwwroot folder.
Step 4: We need to convert it to an application, just right click and then Click on "ConvertToApplication" as shown in the following picture:

After converting it to application, its icon will be changed and then you can set the property for your web application from the middle pane. You can set IIS Authentication Mode, Default Page Just like IIS 6.0:
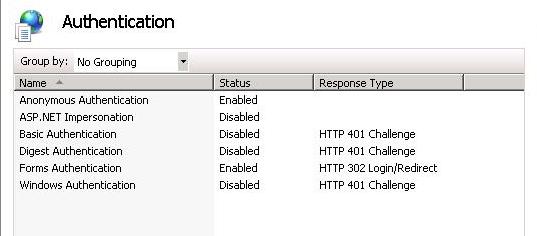
You can change Security Settings on Authentication Section. By default Setting will be set from your web.config itself. As in my web.configForm Authentication was set that's why, Forms Authentication has been Enabled. If we want to change the status, just double click and update status to Enabled to Disabled or Vice Versa.
Now one most important part is to set the Application Pool for your application.
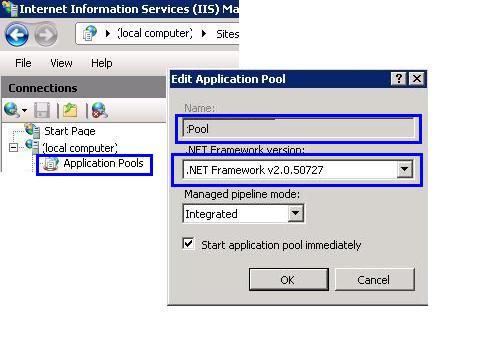
How to Create Application Pool
A site can contain many applications including that site’s default application, which is called the root application. In addition to belonging to a site, an application belongs to an application pool, which isolates the application from applications in other application pools on the server .
Step 1: Right Click on Application Pool and give the name of your pool. Here, I have given "pool" and select Framework and click on OK:
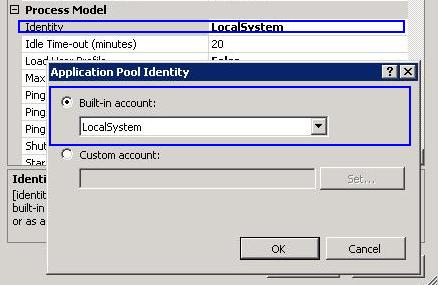
Step 2: If you are writing some thing on the server [may be writes Error Events Logs], you need to change the Pool Identity to Local System. Right click on Pool Identity setting as shown in the following image:
There are three identities of Application Pool:
- Network Service
- Local Service
- Local System
Assign Application Pool To Your Application
Now, we need to assign the Application Pool to our web application.
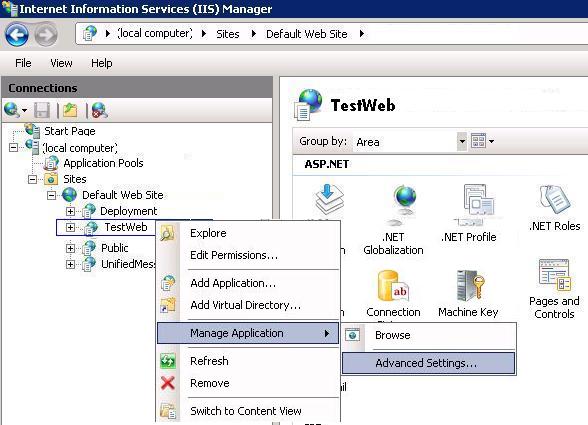
Step 1: Right Click on "TestWeb" Application and Select "Advanced Settings":
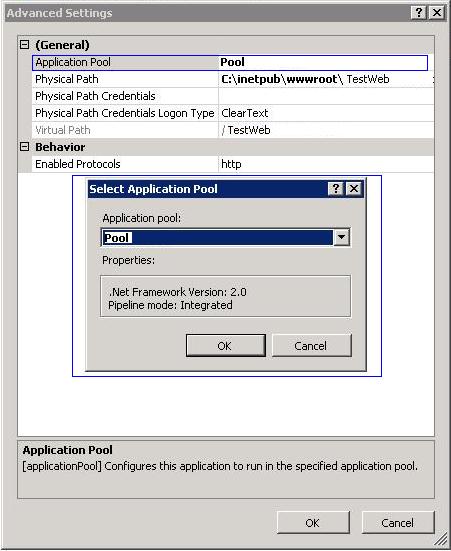
Step 2: Finally assign your created Application Pool "
pool" to "
TestWeb" Application.
Now you can run your application by just typing http:\\localhost\testweb and it can be accessible on network by IP also.
for more ref. http://www.codeproject.com/KB/aspnet/IIS7ASPNet.aspx and theory study http://technet.microsoft.com/en-us/library/cc754705(WS.10).aspx
No comments:
Post a Comment